This is an old revision of the document!
Table of Contents
<texit info> author=Johnny Rieper, Bent Bisballe Nyeng and Kasper Sohn title=Marvin - The Balancing Robot. </texit>
Introduction
This project is the final part of the course Embedded Systems – Embodied Agents at the University of Aarhus 2008. The outline of the project is to demonstrate a practical implementation based on some of the theory acquired during preliminary lab sessions and lectures during the course. In our case we are building a balancing robot using the LEGO Mindstorm Kit and utilizing the LeJOS framework. The balancing robot was included in the preliminary lab sessions and we wish to make the robot able to think for itself when driving. Therefore we shall use the concept of behaviour models which is also a part of this course. This blog will serve as our “documentation” of the project and when necessary we will introduce a little background regarding sensors, actuators and controllers used in this project. The source code will be included in smaller segments following the development of the project, but the entire source code is available for download.
Our original project goal description can be found in its entirety in lab111)
Motivation
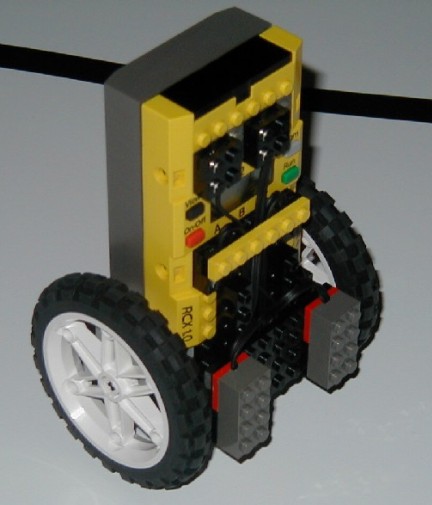
This problem of balancing an inverted pendulum is a nice delicate control problem and it has become the “holy grail” for many robot hobbyists around the world. The task of balancing a two wheeled robot may sound simple, but in reality many people have tried – and failed. In LAB42) we tried to make a self-balancing LEGO robot inspired by Steve Hassenplug's original Legway3) controlled by the RCX using light sensors – and failed. The task it not trivial as it requires knowledge and basic understanding of sensors, actuators and tuning parameters in the control loop. These challenges are appealing to us and we had many ideas of how to improve the implementation from LAB44). These ideas have laid the foundation of this final project, but we are not satisfied by making a simple balancing robot. In terms of the greater field of robotics, the balancing robot is almost purely mechanical, precluding the need for higher-level planning or behavioural programming that a more complex robot might require. Inputs over (discrete) time in the form of pendulum position readings are mapped algorithmically to output in the form of motor control. So we wanted to expand the project by adding behavioural programming using simple behaviours executed by a priority system. The motivation for behavioural programming was founded in LAB85), where we refer to some basic ideas of behaviour control. Another great motivation factor has been all the great videos from Youtube, where great many people have tried to make a balancing robot using the LEGO Mindstorm kit. Most of them are very unstable and only capable of standing still, so it seems as a great challenge to make a remote controlled driving balancing robot with implemented behaviour models enabling the robot to interact with the environment. We were especially impressed with the outstanding implementation by Yorihisa Yamamoto, which can be seen from 6).
Literature Review
A great number of balancing robot projects exists on the internet and many papers on the subject have been published in IEEE journals. Furthermore commercial solutions are available e.g. the world famous Segway. The two wheel balancing robot has been researched by engineers, mathematicians, hobby robot enthusiasts and many more, therefore we shall comment very briefly on some of the papers and documents in which we found inspiration. Overall, the different projects are characterized by a very thorough analysis of both the dynamical model of the physical system and the appurtenant control theory. The time dedicated to this project does not allow us to choose a similar depth in terms of preliminary analysis and calculations, but we can certainly benefit from the experience and conclusions drawn in these pioneering projects. In the projects we have read, there is no preferred controller model, but there seems to be an agreement about which sensor features are needed in order to balance. This is quite promising for our project since we may settle with a simple controller if we manage to utilize proper sensors. (Of course, an advanced controller model would not be able to compensate for a bad choice of sensors). The control loop contains practically all elements that compose a control system, namely sensors, actuators, the plant and tuning parameters. All these factors are somewhat similar in the literature, but the numerical values must be set individually in every project.
In 7) a two-wheeled differential drive mobile robot based on the inverted pendulum model is built as a platform to investigate the use of a Kalman filter for sensor fusion. The sensor fusion technique using a Kalman filter is a highly researched area and the idea is to combine different sensors in order to ensure higher stability in a given measurement. A common choice of sensor for a balancing robot is the gyro as it can measure the deviation from equilibrium. In practise however, the gyro tends to drift over time and thereby altering the reference value of the control system, hence making the entire system unstable. If we combine other sensors utilizing a Kalman filter we may be able to compensate for this drifting behaviour and keep the system in equilibrium. In the project an evaluation of the performance of a Linear Quadratic Regulator (LQR) and a Pole-placement controller is given as well. All calculations are presented analytically based on a derived dynamic model for a two wheeled inverted pendulum. Although the project illustrates some very exciting and relevant concepts, we have chosen to omit the use of sensor fusion since the Kalman Filter implementation would be too time-consuming in this project. Regarding the control loop we have no theoretical knowledge of the LQR control and again it would be unwise to focus on this type of control in our project. The pole placement controller is a possibility, but we considered this approach somewhat risky as this system will be unstable if the poles are placed too far on the left-hand plane. Therefore we decided to use a PID controller, which hopefully will prove to be adequate. In LAB48) we found quite promising results using light sensors and a PID controller.
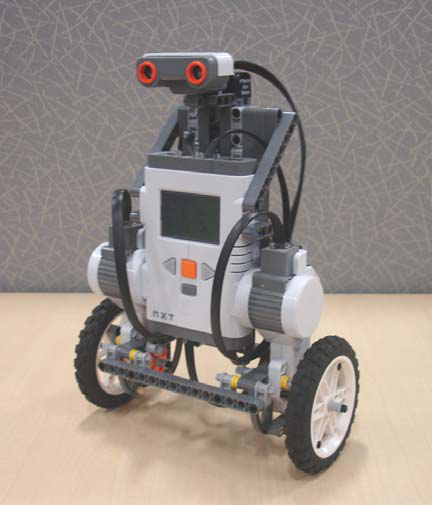
Now let us turn towards the LEGO projects, which are numerous judging from the Youtube homepage. Two projects deserve special attention. Steven Hassenplug 9) has successfully constructed a balancing robot called Legway using the LEGO Mindstorms robotics kit. Two Electro-Optical Proximity Detector (EOPD) sensors is used to provide the tilt angle of the robot to the controller which is programmed in BrickOS, a C/C++ like programming language specifically for LEGO Mindstorms. This project was probably the first balancing robot using the Lego Mindstorm system and sparked many similar projects as this was an affordable platform for many hobbyists. A more recent project called NXTway-GS, written by Yorihisa Yamamoto, 10) is a self-balancing two-wheeled robot built with LEGO Mindstorms NXT and a Hitechnic gyro sensor. The final results of this project is very impressive and can be seen from 11) and 12). Since this ultimately proves that a balancing system can be made using a gyro, we decided to use the exact same model by means of a building manual from the web page. The complete analytical solution by Yamamoto is somewhat complex, but this is mainly due to the simulation part of the project. With the physical model and sensors from this project, it should be possible to create our own balancing robot utilizing a simple PID controller.
Hardware
This section introduces the hardware used in this project. The sensors/actuators will be introduced further in the relevant lab sessions.
NXT Module
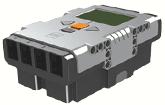
The NXT13) is the brain of a MINDSTORMS® robot.
Motor ports
The NXT has three output ports for attaching motors - Ports A, B and C
Sensor ports
The NXT has four input ports for attaching sensors - Ports 1, 2, 3 and 4.
USB port
Connect a USB cable to the USB port and download programs from the computer to the NXT (or upload data from the robot to the computer). It is also possible to use the wireless Bluetooth connection for uploading and downloading.
Technical specifications
- 32-bit ARM7 microcontroller
- 256 Kbytes FLASH, 64 Kbytes RAM
- 8-bit AVR microcontroller
- 4 Kbytes FLASH, 512 Byte RAM
- Bluetooth wireless communication (Bluetooth Class II V2.0 compliant)
- USB full speed port (12 Mbit/s)
- 4 input ports, 6-wire cable digital platform (One port includes a IEC 61158 Type 4/EN 50 170 compliant expansion port for future use)
- 3 output ports, 6-wire cable digital platform
- 100 x 64 pixel LCD graphical display
- Loudspeaker - 8 kHz sound quality. Sound channel with 8-bit resolution and 2-16 KHz sample rate.
- Power source: 6 AA batteries
The Gyroscope
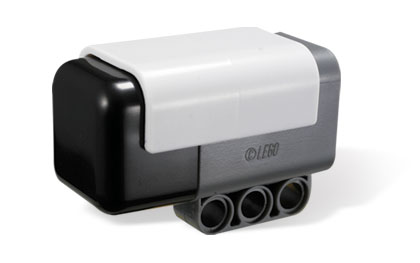
Measure the additional dimension of rotation with the NXT Gyro Sensor. This sensor that lets you accurately detect rotation for your NXT projects. The NXT Gyro Sensor returns the number of degrees per second of rotation as well as indicating the direction of rotation. Measure +/- 360° per second and build robots that can balance, swing or perform other functions where measurement of rotation is essential.
The Sonic Sensor
The Ultrasonic Sensor enables your robot to see and detect objects. You can also use it to make your robot avoid obstacles, sense and measure distance, and detect movement.The Ultrasonic Sensor measures distance in centimeters and in inches. It is able to measure distances from 0 to 255 centimeters with a precision of +/- 3 cm.
The DC Servo Motor
There are three Servo Motors included in the Mindstorm kit. Each motor has a built-in Rotation Sensor. This lets your control your robot’s movements precisely. The Rotation Sensor measures motor rotations in degrees or full rotations [accuracy of +/- one degree]. One rotation is equal to 360 degrees, so if you set a motor to turn 180 degrees, its output shaft will make half a turn. The built-in Rotation Sensor in each motor also lets you set different speeds for your motors [by setting different power parameters in the software]. The motors have sufficient power in order to make the robot balance.
Software
The code is purely written in the Java syntax through the Lejos NXT framework.
We use CamelCase notation 14) for both the methods and variable names.
All classes are fully documented by the javadoc documentation conventions 15).
Class overview
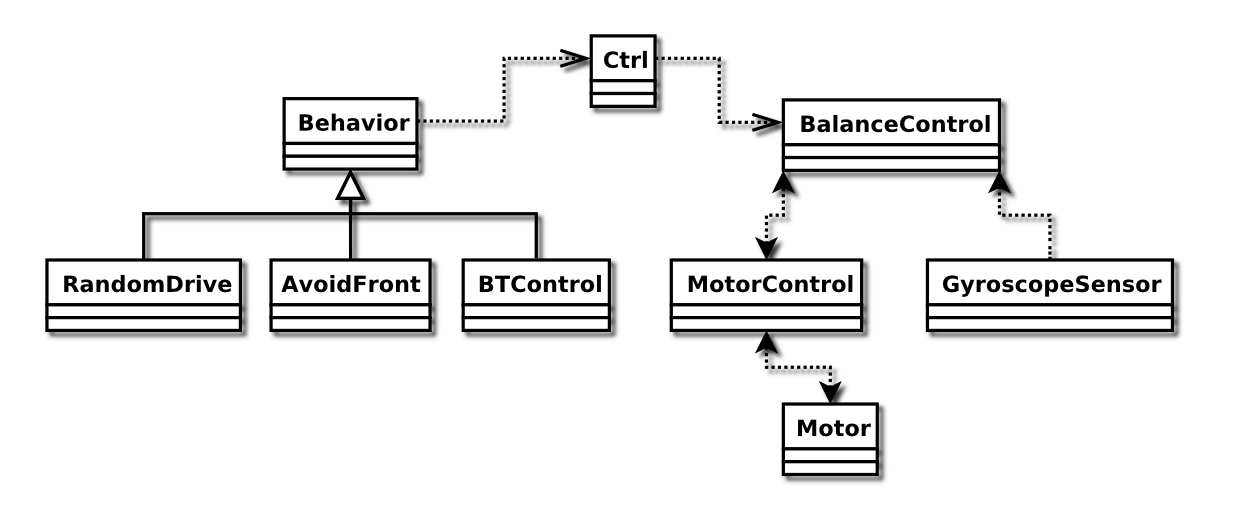 The above figure illustrates all the important classes in the project as well as their relations to each other.
A tarball with the source code can be fetched here: marvin-1.0.tar.gz
Apart from the classes shown in the class overview, there are the Print class, which has been used for debugging purposes (writes number to the display, with a label, and possibility to write doubles), the PCController, which communicate with the BTController class, and finally the Marvin class which contains the main, that simply instantiates all the objects and activates all the threads. these classes can also be seen in the source code tarball.
Take note that printing out to the LCD is a very expensive task, and since the art of balancing is very sensitive, the print class cannot be used while actually running.
The name
The name “Marvin” has been taken from “The Hitchhikers Guide to the Galaxy” in which an android bears that exact name. He is also called “Marvin, the paranoid android”16), which refers to his sad mood, caused by a severe depression, and boredom, a behaviour we saw mirrored in the way our particular robot was moving and behaving.
Structure of this Document
This documents is divided into 7 parts. This introduction is the first part. This is meant to give a general introduction to the Lego Mindstorm NXT universe.
The following 5 lap reports describes the process and the results.
Lap report 1 describes how the robot was build and how the communication with the gyroscope is handled.
Lap report 2 describes different control architectures , which one we use and how it is implemented to make the robot capable of balancing. Furthermore an introduction to tuning parameters and an evaluation of which features of an error signal to use is presented.
Lap report 3 describes the steps involved in making the robot able to drive forwards and backwards on from there able to drive at a predefined pattern.
Lap report 4 describes the implementation of behaviour models which include behaviours such as the ability to drive autonomously and avoid obstacles.
Lap report 5 describes how to make the robot remote controlled utilizing BlueTooth.
Finally there is a discussion about the results and a conclusion of the project as a whole.

